
Note: At this time, printing from a laptop or other computer not managed by the CSL is complicated, and not generally supported for students. Students should print from a CSL supported instuctional Linux or Windows computer.
Printing from Windows Computers not managed by the CSL
To print from a computer not managed by the CSL, you will need to use the Department VPN .
Before adding the printer on Windows, install or extract the correct driver for the printer you are configuring .
Windows 7
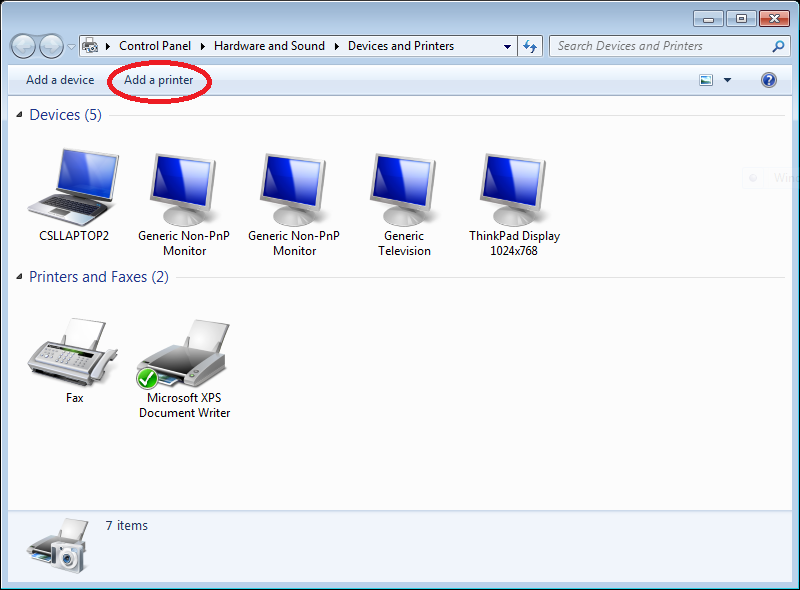
- Open
Start Menu - Select
Devices and Printers - Select
Add a printer
- Select
Add a network, wireless or Bluetooth printer
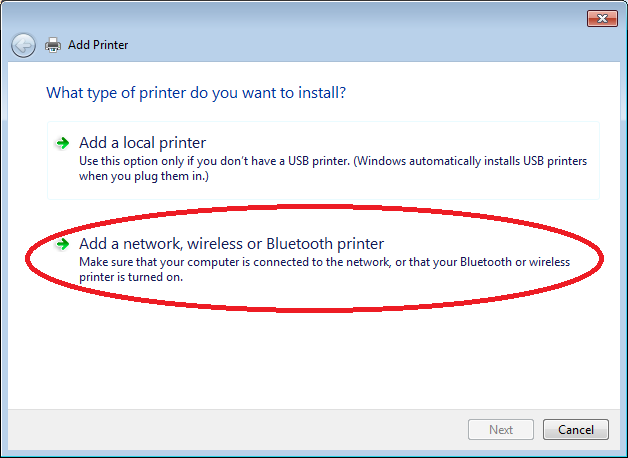
- Select
The printer I want isn't listed
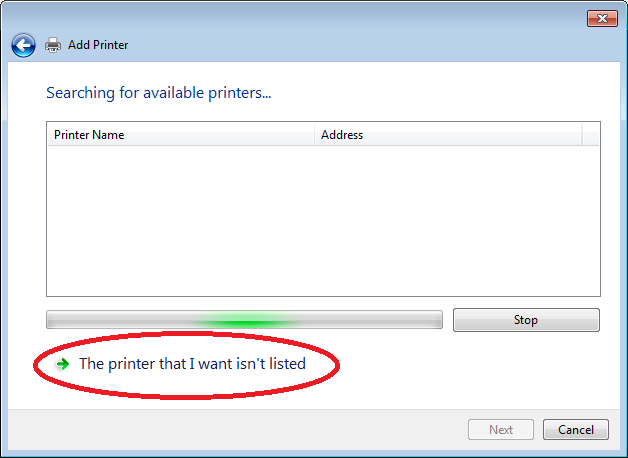
- Select
Add a printer using TCP/IP address or hostnameand clickNext
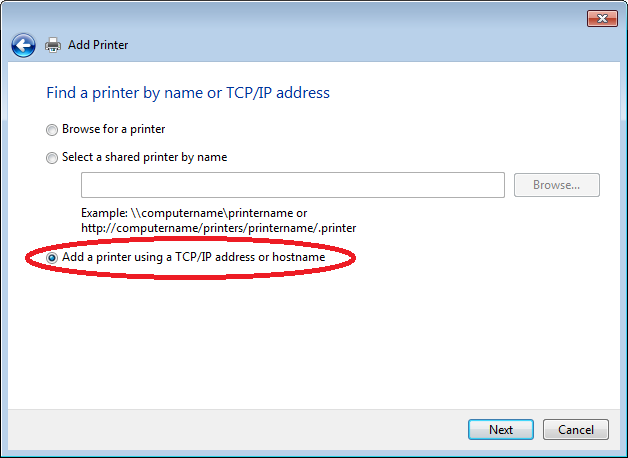
- Enter the following parameters for the printer hostname/IP address
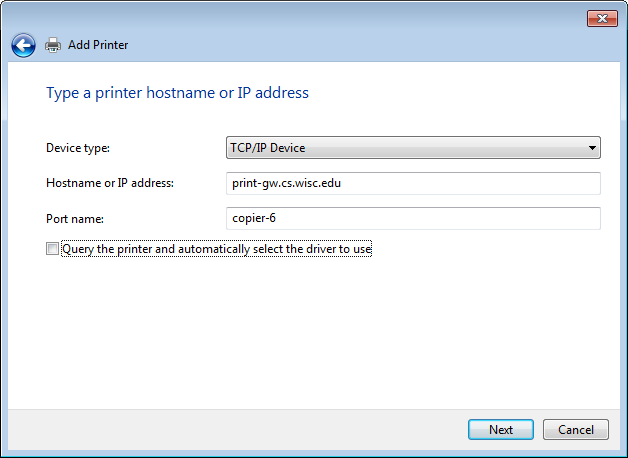
- Device type:
TCP/IP Device - Hostname or IP address:
print-gw.cs.wisc.edu - Port name: printer name example:
copier-6 - Uncheck
Query the printer and automatically select the driver to use - Click
Next
- Device type:
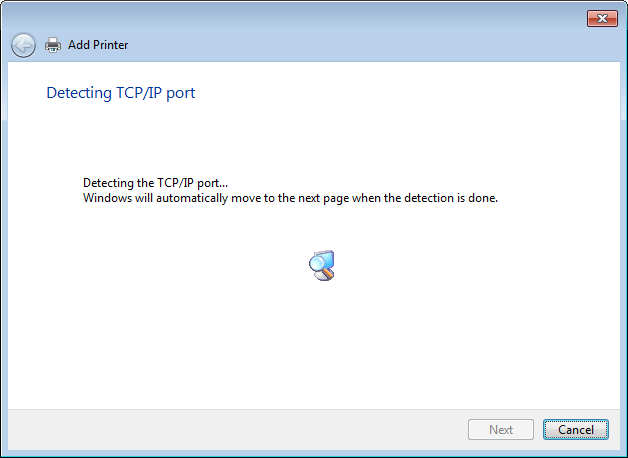
- You may see a long delay on the
Detecting TCP/IP portscreen before the next screen is available for input. Please be patient; this delay is expected.
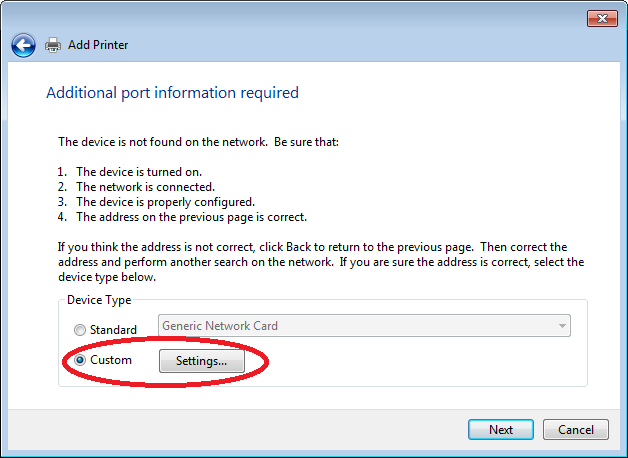
- Select Device Type:
Customthen clickSettings
- Enter the following
Port Settings
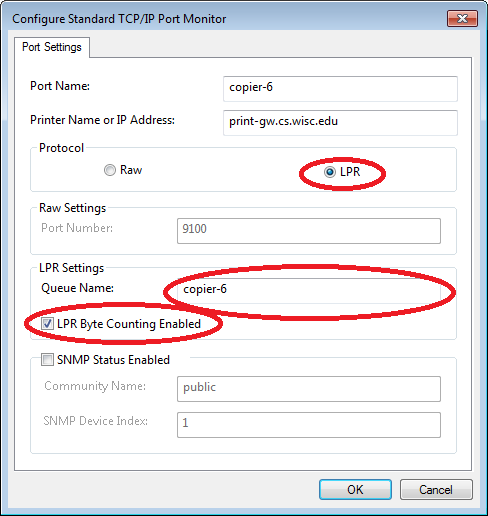
- Protocol:
LPR - LPR Settings Queue Name: enter queue name (example:
copier-6) - Check
LPR Byte Counting Enabled - Click
OK
- Protocol:
- Click
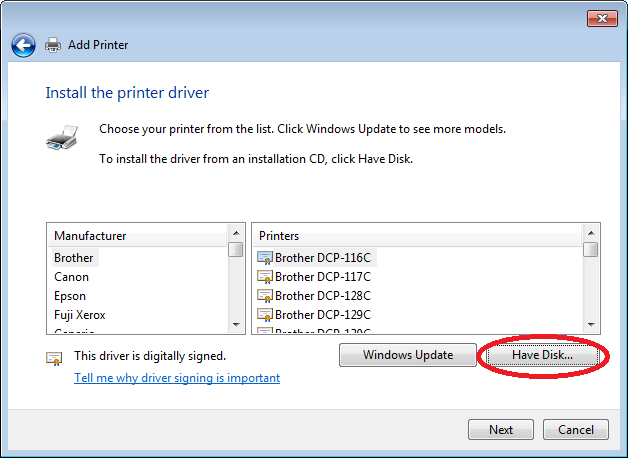
Next - Select the printer manufacturer and model to use the driver you installed above. If you can’t find the model you are interested in adding, the file you downloaded may be an exe file which will extract the needed drivers to a folder. You will need to specify this folder by clicking
Have Disk...and navigating to the driver you downloaded above.
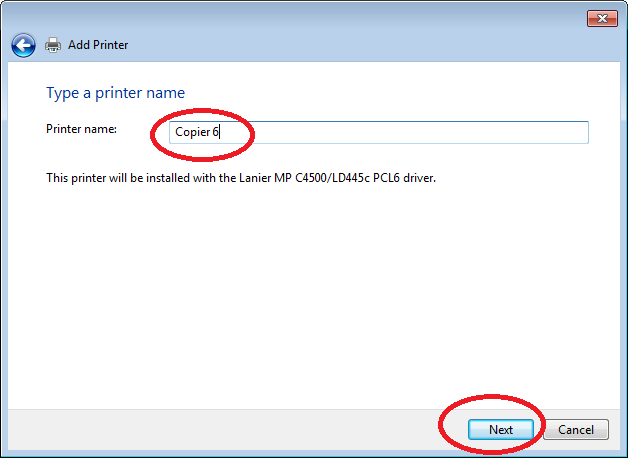
- Click
Next - Specify the name of the printer (for example
Copier 6, but it’s your choice as to what you want to name it), then clickNext
- On the Printer Sharing screen, select Do not share this printer and click Next
- You may want to disable the
Set as the default printeroption (your choice) - Click
Finish

If you are an international student, or your PC or copy of Windows came from a foreign country, you may need to change the default paper size from A4 to Letter.
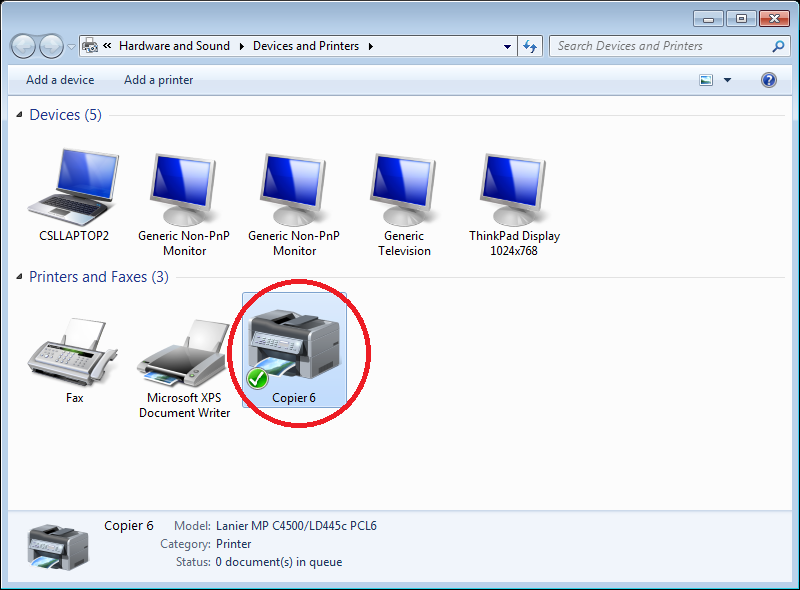
- Go to Devices and Printers, if it is not already open.
- Right click on the printer you just added. Click
Printing Preferences
- You will be presented with a window that gives you the option to select paper size.
- Select
Letter (8.5" x 11")from the drop-down box if it is not already selected.
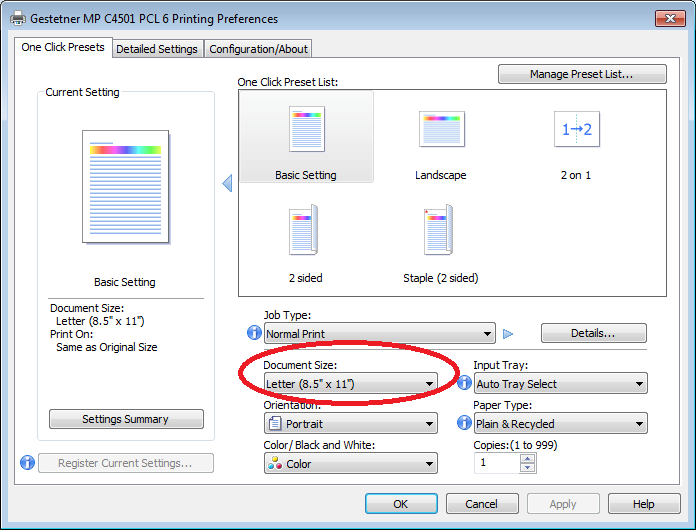
(Please note that window you see may be different from the example picture depending on what printer you added.) - Click
OK.
Windows XP
- Open
Start Menu - Select
Settings - Select
Printers - Run
Add a new Printer - Check
Local printer - Un-check
Automatically detect plug-and-play printer - Check
New Port - Select
Standard TCP/IP port - Input the Printer Name:
print-gw.cs.wisc.edu - Input the Port Name: Use the name of the printer you want to use
- (this takes a while)
- Select
Custom Settings - Check
LPR - Input the Queue Name: Use name of the printer you want to use (
2a,3a,copier-5, etc) - Check
Use LPR byte count - Name the port by the name of the printer
- Check
No port sharing - Select a printer driver to use with the printer
If you would like to use copier-5's finisher for advanced features such as stapling, follow these additional steps:
- Enter the properties for the printer you have set up for
copier-5(Enter the Control Panel, open Printers and Faxes, right-click the printer and select properties) - Click the accessories Tab
- Uncheck “Copy Tray” and check “Finisher SR970”
- Click OK
- This should make the advanced features on
copier-5available to you.